Search This Blog

Friday, March 30, 2012

Myrtle Beach Sign


I took this picture Spring 2011,  Actually found it very truthful.

Gaudy

     This landscape design has to be the most "Gaudy" display I have seen in years.  Basically goes against all my visions and ideas but hey, to each his own.  

Sign should read, "Beware of the Landscape Designer who did this".


Here is another front yard plagued by the same designer by my guess.  Wow, such originality. 


Wednesday, March 28, 2012

Tick Alert-Part 2


 ***********

     I just found this nice fat guy at the base of my office chair.  I don't think it came off myself which I doubt because I have been checking myself for ticks every day. It might have came off of my cat, Kahlua, who has  been exposed to some outdoor activities lately.

 Please see Link Below.

http://news.yahoo.com/blogs/upshot/ticks-season-coming-ll-bug-spring-213325176.html


Monday, March 26, 2012

Cold spell preventative measures

     Here is Just a couple of ways we protected vulnerable shrubs and trees from the brisk cold that will be coming tonight.   I also covered a few Lilacs with flower buds, as well as some PJM Rhodos ready to burst.
   
     Took in all my trays of perennial seeds indoors just to be safe as well.

     I covered my two year old Kerria ready to bloom this coming week with some towels that are about to be donated to the animal shelter by my mom. 


     For some of you, we all know who this character is, my Dad.  Smart move by protecting these prized grafted cut leaf maples all budded out.  Kid you not, they are worth their weight in gold and older than me.   
     He later took a journey to Home Depot to get more tarps for the peach trees in bloom.  Wouldn't want the insects to starve this year because that's the only purpose those peach trees serve.

Sunday, March 25, 2012

Hard Freeze- Northeast

   
 Alert
***********


There is a hard freeze coming Monday night. If you were fooled by all this warm weather and have planted or brought out tender, non hardy plants I suggest you either mulch over or bring plants inside if all possible.


Seed Starting-- Part 1

     Now is the time to get a head start on getting your seeds germinated.-I had nine seed trays started. and I have found that seeds are finicky.  Certain seeds are fool proof as long as they are prepared correctly.

Just follow instructions on seed packs and you will be fine. Certain seeds need to be nicked or soaked overnight.
In the picture below, the left container is an egg carton that I made into a seed tray by cutting off the top of the egg carton to put the seeds in, and then placed the top flap underneath to use as the tray. I poked holes in bottom of each egg compartment for drainage. This is a very "green" way of reusing empty egg cartons. The  tray on the right is peat containers.


For soil, I have been using a seed starting bagged mix, such as Scott's Miracle Grow Seed Starting Pot Mix.  Its very dry so I pour it into a bucket and add water while I mix it with my hand to get it to a nice moist consistency.  I then fill up the seed trays and pots by hand or scoop it out with a spoon. After following instructions for how deep the seeds need to be, I store trays in any area inside where I can keep an eye on for germination.

*I have found you cannot always go by germination rates on seed packets. I have had seeds germinate in days where it would say it would be a week or two. For example, I just started some Zinnia last Thursday, already coming up.      

Friday, March 23, 2012

Transplanting Hydrangeas-(basic shrub transplanting method)

Please Note: This method can be done with most shrub transplanting

     I spent the day transplanting Big Leaf Hydrangeas today at the home of Eric "Bossy Man" Dengler.  It was quite a different day because Eric wasn't acting boss man on this job.  Its really is not a hard job transplanting shrubs once you get a system going and you have help.
     These plants which I was working with had to be at least 10 years old and well established.  There were numerous off shoots at the base which is a free gift from Mother Nature and for me as well to take to my garden.  The offshoots come loose pretty easily once you free up the whole plant from the ground.


     Start digging around existing plant to where you want to create an easy way of freeing up plant.  Side roots are not usually a problem.  Its the tap roots which tend to grow straight down and make it difficult to free up. Just jam shovel in bottom of exposed root system and lift up.  If you can, take shears or loppers and cut exposed root. Its easier with two people, Eric's Brother Wes was around to lend a hand.  By then its free to be moved to new spot. A hand truck or dolly with wheels is a big help.  I recommend after gauging how big the root ball is, dig the hole a little bigger than the root ball where the plant is to be transplanted. 


The top and bottom picture give you an idea to what spacing is proper for a healthy transplant.  


Next step which I do is that if the soil isn't all that great, is to mix in bagged topsoil with the back fill.  I add in a few handfuls of fertilizer, I like organic fertilizer like Plant Tone.  If you like your Hydrangea to be blue, also add into the back fill some Soil Acidifier or aluminum sulfate. After all that start filling in soil around plant with either a shovel or your hands. You should have a nice level area around plant, making sure soil line is a least level with ground or slightly below plant. Watering the plant is the next step.  
I like to add mulch before watering new plantings to prevent soil from washing away due to the amount of water you will be using.  
*Please take note "Not a Fan of Red Mulch" but its what they like in their garden.  
I soak it for a good few minutes to make sure all areas under plant receive soil washed down with the water. You basically want to get rid of all air pockets in root system.
Continually water new planting every other day for at least a week.


Above and below are the finished product with some perennials mixed in as well.  A total of Five Hydrangeas were moved and I feel it will make a nice new look to the front yard.  I am sure Marcie, being Eric's wife, will enjoy the new look.

 Please see post on pruning with further questions relating to that matter. 
would also like to thank Eric and Marcie for allowing me to take a bunch of new hydrangea plants home. 
Well worth the work.


Thursday, March 22, 2012

Start Dividing your Hosta,Daylilies Etc Etc Etc.

     If you are familiar with your Perennials,then you know what an overcrowded crown looks like. This is when its time for some maintenance. That is a word I like to use a lot due to the fact that gardening is "work" but an extremely rewarding form of one, don't forget.
     I tend to divide anything that will tolerate it.  I have been doing it for the past two weeks, if it shows its head through ground, I start to dig.  I usually just divide the clump by hand when all possible.  Just a preference I have for this process, gentler way of doing it.

Just divided Sedums today and it was anything but gentle.  Basically drove a shovel through the crown of plant and then transplanted separate parts.  Hosta/Lily of the Valley can be done in same way.


Monday, March 19, 2012

Counter Kitties and Critters


This guy named Lexi above and below wouldn't leave me alone this past week at the Salem Feed and Grain in Salem, Ct.
Great store with so many neat and unusual items for your garden. Great staff and extremely friendly.  Seems that's the case the further I get away from my home town especially in this part of the state.


Here is Lola below.
Chased after me when I stopped petting her.  


This next cat resides at Ballek's Garden Center in  East Haddam, CT
 The Staff said he isn't a friendly cat but I beg to differ on that one.
By The Way, they have a lot of neat and unique garden decor.


         Say "Hello" to Murphy, what a bundle of joy 
                                         wandering around spreading joy, especially to Uncle Tony.                                        


Here is my Uncle Tony with his new found love, Molly.


This is the Famous K.C. "beanpole"
Cat


These two guys below found it justifiable to create their own canine roadblock in Bozrah.
After answering their three questions I was finally allowed to pass.


Kahlua is wondering if Medusa really exists at this point.


Sunday, March 18, 2012

TICK ALERT --- Westcher County,NY

     WITHIN THE LAST FIVE DAYS, I HAVE HAD 3 TICKS ON ME ON TWO SEPARATE  OCCASIONS IN WESTCHESTER COUNTY .  MOST RESENT ONE WAS THIS AFTERNOON JUST GARDENING IN RESIDENTIAL AREA. PULLED TICK OUT OF CHEST JUST GETTING HOME.


Tuesday, March 13, 2012

Yellow Crocus

Took this spectacular image of a lone yellow crocus.
Snapshot was taken in Greenwich ,Conn. 03/11/12
Property owned by L. Dell

Iris Dividing and Care

     I have found that after a few years you get what you paid for with planting irises ten-fold.  It's just the dividing process that deter a lot of gardeners that are a little unwilling to maintain their responsibility with  maintenance of this perennial with big returns.
     I like to divide irises either in early spring or fall. I divide 4 over-grown patches about a foot and a half in diameter and that was a task. It's such a great reward to  me because you have so many off shoots for other plantings and little seedlings  as well that you will find yourself giving them away (which i did).

For starters: The following two pictures show iris patches in need of dividing. When I dug them up, it confirmed my suspicion of overcrowding. 


The following pictures is what an Iris that is too the point of neglect and never divided.  Notice how the rhizome looks like one long turd. This will cause the plant to refuse to flower and slowly just wither away.

I just snapped off most of the long rhizome and in following picture is what you should be left with before replanting.


Below is what a healthy iris patch should look like. Exposed tubers are a necessity for warmth from the sun and where root systems can spread out.  They should not be planted in an area where it's extremely wet or moist, contrary popular to belief.  Spacing should be at a foot apart. This might seem excessive but in a few years you will see how much they spread out!


     To get started., get a good garden shovel and dig around the whole iris patch and properly lift it in its entirety from the ground. This is when you have to take the gloves off and start gently breaking apart the existing clump, tuber by tuber.  Imagine a bunch of small elongated potatoes intertwined and getting them separated as whole as possible.


This is what a properly divided iris patch should look after dividing.
Some of the iris rhizomes should be exposed and always facing towards where it will get the most sun.


They love to be exposed like this so don't feel guilty.


Saturday, March 10, 2012

Mahonia Bealei

     Just a quick post on a plant which I have had for about 7 years now. This is called a Mahonia Bealei or Leather Leaf Mahonia.  My father introduced me to this plant and it is a big conversation piece in the garden all season long. I have given away offshoots of this plant and its basic use is for winter interest. Deer will not touch this plant at all.


In the below picture you can see the other Mahonia in the background. During the full growing season these plants fully blend in with the surrounding seasonal plants.


Previous pictures taken on March 10th

In the next two photos the flowers are opening up on March 22nd.


Late Winter Garden Maintenace


     I just spent the past three days getting my garden up in Bozrah, CT ready for the spring and I still have more to do! This family cabin has been around since the 1930's and is quite a throw back to those times.  Bathroom facilities are limited to the outhouse which you will see in my pictures. Water is drawn from a well and there is a pump in the kitchen where it comes out of.  It's not for everyone but I enjoy its amenities. I finally spread all the the river stone out, 10 tons of it to be exact. Next time I make it up here, hopefully in a week or two, I will to start dividing perennials that need it. I will of course have extra to give out or find a new home for.  I won't even to begin naming plants because there are just to many and its still so early yet.  I do see my Dicentra popping up along with some early flowering perennials.
    

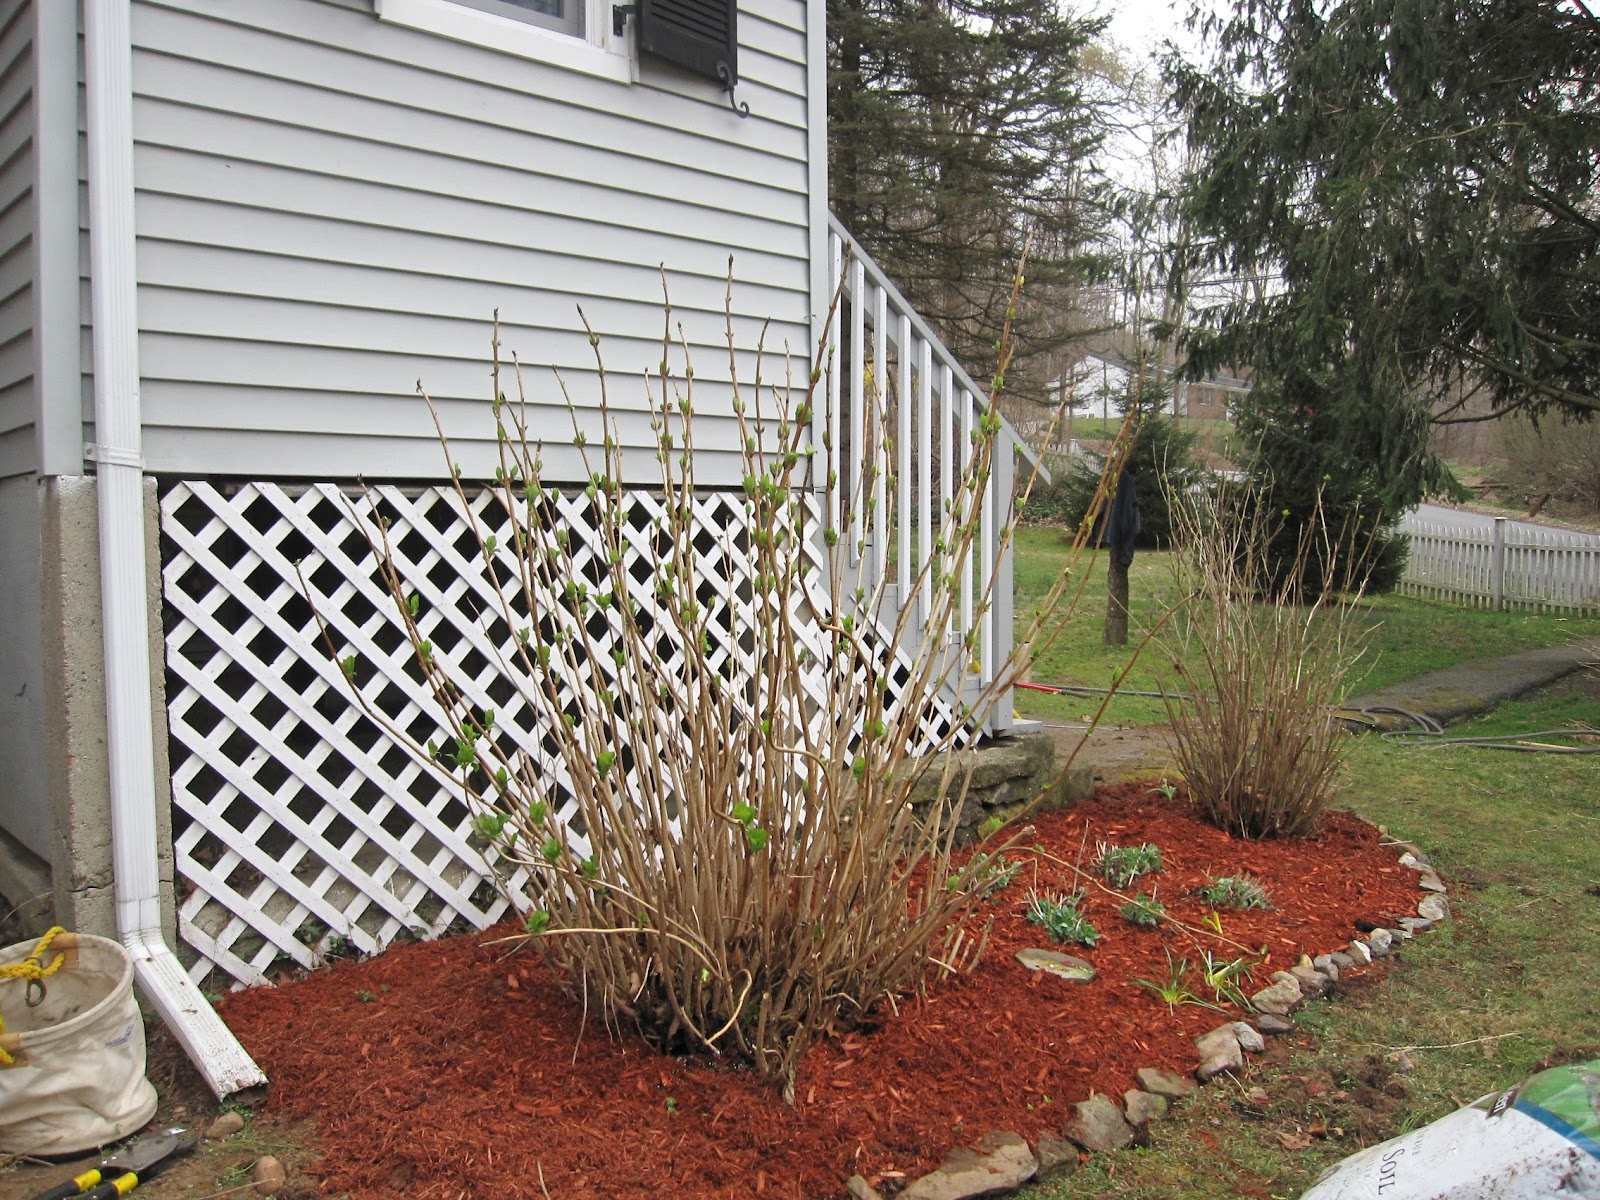
*One rule of thumb I have is not to remove or blow leaves away from all your flower or growing beds till early spring.  Leave them alone int the fall.  They act as a protector from the winter elements and will help protect seeds produced from self seeding perennials.  I have so many seedlings due to this practice. 


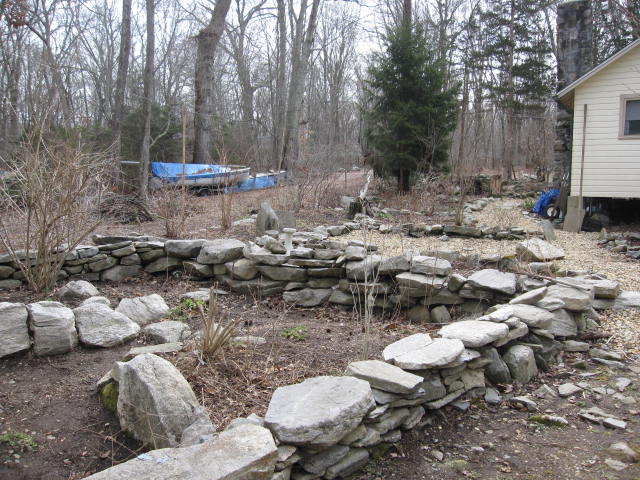
As you can see I distributed inch-size river stone throughout all pathways and everything else you see in following pictures are planting beds. You can see the difference with the time of the year with a pictures I have posted with this entry from previous posts taken during spring/summer-what a transformation!


 This picture is from a different angle from the first one in the post-they were both taken from the roof of my cabin to see the stone work from above.


This is the newest area of the garden where some space got freed up due to the outhouse being moved from its original spot which is just right of that stump in center of photo.


 This next area is the Northeast corner of the garden which gets the most sun. Next couple of pics will give you a ground level view so you can get an idea of its openness.


Eventually this is going to be a picnic area with large stones in back center acting as a foundation for a homemade BBQ grill.


Have to give credit where credit is due, this wall in the below pic I dubbed "Julie's Wall".  It was the last of the major stone work to go in the garden.  My sister Julie built it a few years back and to the right of the wall (which is not seen in the picture) she had a beautiful hand made copper trellis which blew down in a storm.  I think the weight of the trumpet weed contributed to that.  I plan on re-erecting it sometime this spring for my morning glories to take hold of.  This is the low spot in the garden and plenty of sun so growing specific varieties is unlimited.


 Just a view looking south from back of garden in below pic. Center island with Holly and Pieris is a nice shady damp spot where wet shade perennials thrive.


     I am still thinking about what is going to take over here, so far its just the Callicarpa shrubs, but its an open ballot for the perennials. Some joe pye weed likes to make its mark along with some stray foxglove.    I have about Five Callicarpa and have already pruned them down to about a foot or so which are over to the right of screen not seen. Just decided next time I am up these Callicarpa will get transplanted to left side of pic along wire fence (below pic), they take up to much space where they are now. This is the perfect time of the year to do this. They will fool you come late summer with how big they get, which is usually 6-8 ft in a single season for me. 


Below Picture is a East facing view from outhouse-a newly cut down tree lost in last storm has paved the way for sunlight and sun loving plants. I have a 'Lil'Kim' Rose of Sharon, Mock Orange, hybrid Kalmia and a bunch of small lilac seedlings just planed last year. Should look great in a few years.